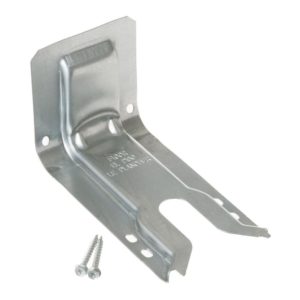
Anti-tip devices protect you and your children from a freestanding oven (range) from tipping over. If these appliances are not secure, they can be very dangerous! This $10 part from any home center can prevent serious burns or death.

More resources:
by Marshal
Anti-tip devices protect you and your children from a freestanding oven (range) from tipping over. If these appliances are not secure, they can be very dangerous! This $10 part from any home center can prevent serious burns or death.


More resources:
by Marshal
BY LADD EGAN
KSLTV.com

SALT LAKE CITY —Lehi – A Utah woman is warning others about the danger of radon after she received a stage 4 cancer diagnosis for non-smoking lung cancer.
“The oncologist explained that it had metastasized,” Lehi resident Kerri Robbins said. “So it had gone from my lungs to my brain.”
Doctors first discovered the brain tumors when the 65-year-old went to the emergency room in June after she started throwing up one morning and was confused.
“As I’m washing my hands I’m looking in the mirror and I don’t know why I’m there,” Robbins said.
Follow-up visits revealed the primary source as lung cancer. It wasn’t until she made an appointment with a specialist that she thought about what may have caused her cancer.
“The first thing he said was, ‘Have you had your house tested for radon?’” Robbins recalled.
She and her husband recently had their home tested. The results revealed the radon level in their home was 31.3 picocuries per liter.
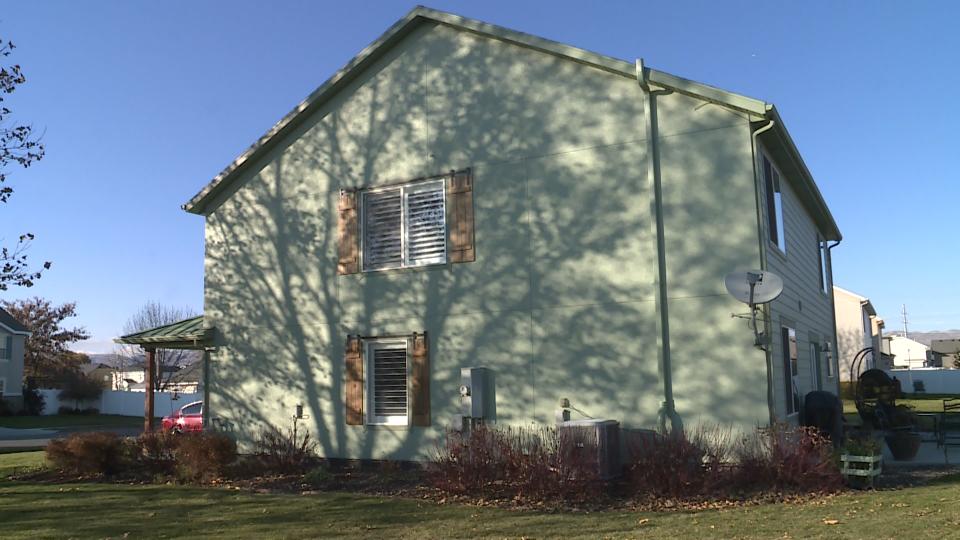
“30 picocuries is like smoking three packs of cigarettes every day,” said Eleanor Divver, the radon coordinator at the Utah Department of Environmental Quality. “It’s heartbreaking to hear these stories and yet I hear them every day.”
The Environmental Protection Agency’s action level for fixing a home for radon is anything higher than 4 picocuries per liter.
“I love my house. I love my neighborhood and come to find out that that’s probably what’s given me cancer,” Robbins said. “I get up the next morning and I thought, ‘I’ve got to let people know this.’”
Like most of us, Robbins spent more time at home during the pandemic. But even before the pandemic she worked at home. Her office is on the lowest level of her home, where radon typically gathers.
“I’m working in that office five days a week,” she said.
Her husband, Ron, is now going to the doctor for his own scan. He says radon wasn’t even on their radar.
“You can’t see it. You can’t smell it. You can’t taste it,” Ron Robbins said.
Radon is a radioactive gas that forms naturally in the ground as uranium and other metals break down, according to the EPA. It enters homes through cracks and gaps in the foundation.
Known as a slow and silent killer, radon causes about 21,000 lung cancer deaths every year in the U.S., the EPA said.
Lung cancer is the leading cause of cancer death in the Beehive State even though we have the lowest smoking rate in the nation, according to the Utah Department of Environmental Quality.
“We know that the risks are great for lung cancer,” Divver said.
Children at more at risk, Divver said, because they’re lower to the ground, breathe more often and because of the shape of their lungs.
“We see the highest levels in the winter months,” she said.
In the winter, people keep their doors and windows shut, keeping the radon trapped inside.
“I’m probably seeing the higher radon levels in newer homes because we’re making homes so airtight,” Divver said. “We’re building in areas where we used to mine. So we’re seeing it everywhere.”
The only way for Utahns to know if their home has elevated levels of the cancer-causing gas is to get a test.
The EPA recommends testing your home for radon every two years and to test after any renovations or if family members begin living in the basement.
TJ Mellars with Utah Radon Services said the good news is that you can rid your home of high radon levels with a mitigation system.
“So that the gases, instead of getting pushed up into the home have an escape route by getting sucked up through the radon pipe and then vented above the roof line.”
This week his company installed a system at the Robbins’ home.
“It’s a small expense to pay to reduce the risk of lung cancer,” Mellars said.
Mellars said the every home is different and to not forgo testing based off of assumptions or how your neighbor’s home tested.
“A lot of people think only old homes with big cracks in the foundation have radon and that’s simply not the case,” Mellars said. “New homes are just as susceptible”
Robbins is undergoing treatment and warning her neighbors and anyone who will listen about the dangers of radon.
“You’ve got to know,” she said. ”Please, get tested.”
She’s focusing on spending time with her family and friends and is staying busy baking hundreds of Christmas cookies for her neighborhood.
“I’m so incredibly blessed because there’s a lot of other people whose stories are much different than mine,” Robbins said. “I’m sure at some point in time it won’t be very pretty. But in the meantime, we’re going to take every minute we can get.”
NOTE: This article has been reposted by Optimal Home Inspections as a service to our clients. This article was edited for space considerations. For the original article see https://ksltv.com/511741/utah-woman-warns-about-radon-after-cancer-diagnosis/
New Jersey resource: NJ Dept of Environmental Protection: Radiation Protection Element
by Marshal

PSE&G is in the process of replacing 2.3 million electric meters with new smart meters. If you are a PSE&G electric customer, here is what you should know about the smart meter installation process.
If you are a PSE&G electric customer, here is what you should know about the smart meter installation process:
The new smart meter we install will provide you with several benefits, including:
To learn more about our smart meter effort, please visit pseg.com/smartmeters.
NOTE: This PSE&G article has been reposted by Optimal Home Inspections as a service to our clients.
by Marshal
by Marshal
If you are having a maintenance or home health inspection of your home, here are some ways to make your home inspection go smoother.
Checking these areas before your home inspection will optimize the time we inspect your home.
by Marshal
“Aging in place” is the phenomenon describing senior citizens’ ability to live independently in their homes for as long as possible. Those who age in place will not have to move from their present residence in order to secure necessary support services in response to their changing needs.

As the baby boomers age, the 60+ population will spike from roughly 45 million in recent years to more than 70 million by 2020. Research shows that baby boomers’ expectations of how they will receive care differ from that of their parent’s generation. Overwhelmingly, they will seek care in their own homes and will be less likely to move into assisted-living settings.
Many corrections and adaptations to the home can improve maneuverability, accessibility, and safety for elderly occupants, as well as those whose mobility is limited for reasons that are not age-related. Some such alterations and recommendations for a home are as follows:
Appliances:
Countertops:
Bathroom:
Exterior:
Entry:
Electrical, Lighting, Safety, and Security:
Flooring:
Hallways:
Miscellaneous:
Overall Floor Plan:
Reduced Maintenance and Convenience Features:
Stairways, Stair Lifts, and Elevators:
Storage:
Windows:
Advice for those who wish to age in place:
Residential Outbuildings
An alternative to adapting the primary residence is building or adapting an ancillary structure on the property. So-called mother-in-law apartments are sometimes built over detached garages so that the non-primary resident can enjoy some autonomy and independence from the nuclear family in the main house. Carriage houses, barns, and studios are often adapted as extra living quarters. While these types of dwellings can be upgraded to offer the basic necessities of a standard home, such as a sleeping area, sitting area, refrigerator, toilet, shower stall and sink, they may lack a bathtub, stove, and separate rooms. The electrical and plumbing services tend to be limited, including the number of receptacles and GFCIs. Also, there may be no HVAC system beyond the required system venting.
Mobile housing units, accessory dwelling units (ADUs), practical assisted-living structures (PALS), the nicknamed “med cottages” and “granny-pods” are newer housing innovations that are gaining popularity with homeowners who wish to house aging or infirm relatives on their properties without building an addition onto the primary residence. Both parties are able to enjoy some privacy, and the non-primary resident can achieve an appropriate level of independence. Many of these units have high-tech features, such as electronic medical alert systems, timers, video monitors, and automated floor lighting, such as that which illuminates the path from the bed to the bathroom that turns on by foot pressure.
While these units may incorporate some abbreviated systems of a traditional home (i.e., electrical, plumbing, HVAC), high-tech features such as those described will require installation by a manufacturer’s representative or other knowledgeable experts. Additionally, local zoning laws may have certain requirements for such structures or may prohibit them altogether. Before families go to the energy and expense of upgrading an ancillary structure, they should check with their local building or zoning department.
by Marshal
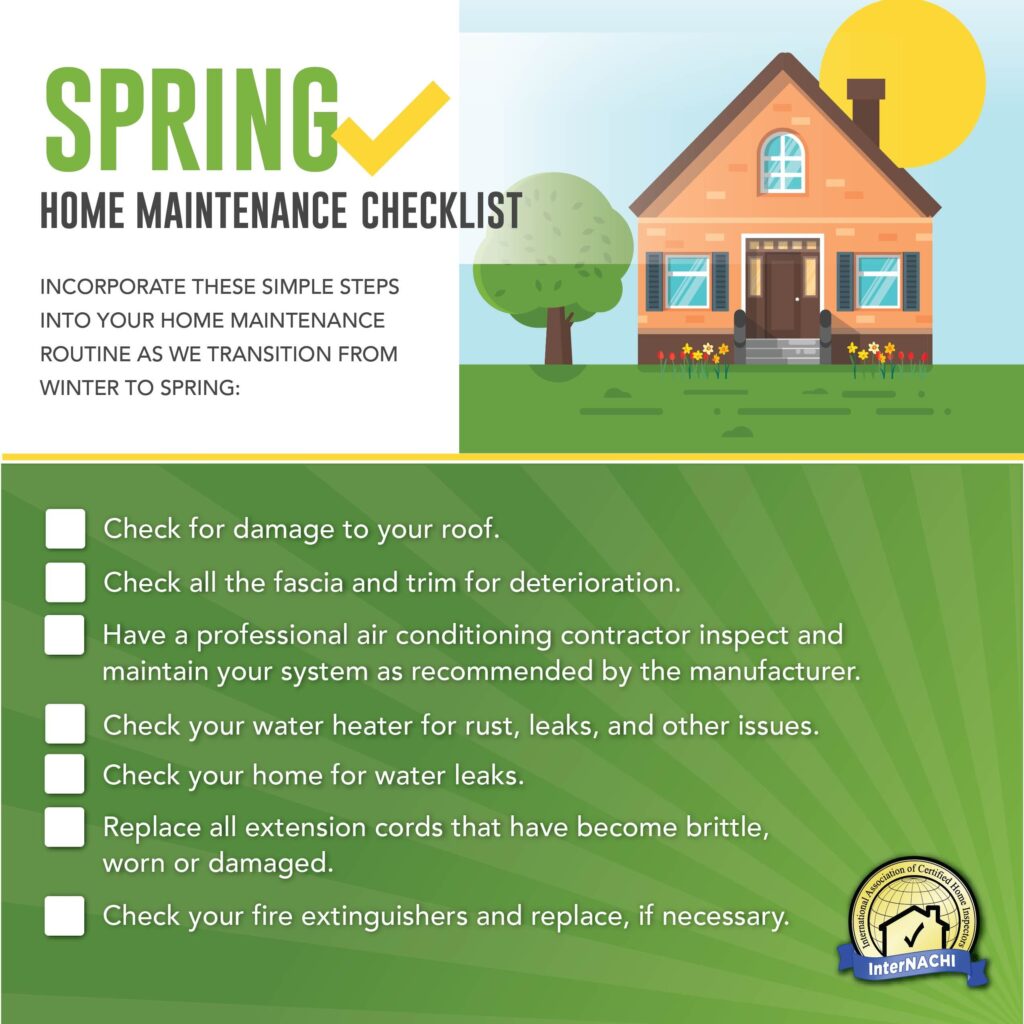
Incorporate these simple steps into your home maintenance routine as we transition from winter to spring.
by Marshal
Many communities have enacted safety regulations for barriers at residential swimming pools—in-ground and above ground. In addition to following these laws, parents who own pools can take their own precautions to reduce the chances of their youngsters accessing the family or neighbors’ pools or spas without supervision. This booklet provides tips for creating and maintaining effective barriers to pools and spas.
by Marshal
Preventing Water Intrusion in Basements & Crawlspaces
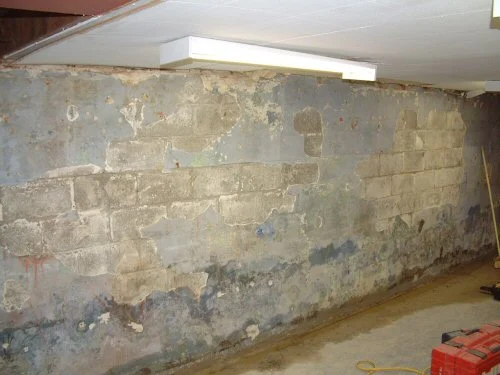
The biggest concern for homeowners related to their basement and/or crawlspace area is unwanted moisture intrusion. This can be the result of several factors, which is why homeowners should occasionally check these areas.
The basement is typically the area of a home most at risk for water damage because it’s located below grade and surrounded by soil. Soil releases the water it has absorbed during rain or when the snow melts, and the water can end up in the basement through cracks. Water can even migrate through solid concrete walls via capillary action, which is a phenomenon whereby liquid spontaneously rises in a narrow space, such as a thin tube, or via porous materials. Wet basements can cause problems that include peeling paint, toxic mold contamination, building rot, foundation collapse, and termite damage. Even interior air quality can be affected if naturally occurring gases released by the soil are being transmitted into the basement.
Properly waterproofing a basement will lessen the risk of damage caused by moisture or water. Homeowners should be aware of what they can do to keep their basements and crawlspaces dry and safe from damage.
Prevent water entry.
You can help prevent water from entering the basement by ensuring that it’s diverted away from the foundation. Poor roof drainage and surface runoff due to gutter defects and improper site grading may be the most common causes of a wet basement.
Here are some measures to use to divert water away from the foundation:
Repair all cracks and holes.
There are several causes of cracks and holes that permit moisture intrusion. Poor workmanship during the home’s construction is one factor. Water pressure from the outside can also build up, forcing water through the walls. The house may have settled, causing cracks in the floor or walls. It’s important to repair all cracks and small holes to prevent leaks and floods. Any large cracks or holes should be evaluated by a professional after consulting with your InterNACHI home inspector.
Here are some steps to take if you suspect that water is entering the basement through cracks or holes:
by Marshal
A building’s central air-conditioning system must be periodically inspected and maintained in order to function properly. While an annual inspection performed by a trained professional is recommended, homeowners can do a lot of the work themselves by following the tips offered here.
The exterior condenser unit is the large box located on the side of the house that’s designed to push heat from the indoors to the outdoors. Inside of the box are coils of pipe that are surrounded by thousands of thin metal “fins” that allow the coils more surface area to exchange heat.
Follow these tips when cleaning the exterior condenser unit and its inner components — after turning off power to the unit, of course.
Condensate drain lines collect condensed water and drain it away from the unit. They’re located on the side of the inside fan unit. Sometimes there are two drain lines—a primary drain line that’s built into the unit, and a secondary drain line that can drain if the first line becomes blocked.
Homeowners can inspect the drain line by using the following tips, which take very little time and require no specialized tools:
Air filters remove pollen, dust, and other particles that would otherwise circulate indoors. Most filters are typically rectangular in shape and about 20 x 16 inches, and about 1 inch thick. They slide into the main ductwork near the inside fan unit. The filter should be periodically washed or replaced, depending on the manufacturer’s instructions. A dirty air filter will not only degrade the quality of the home indoors, but it will also strain the motor to work harder to move air through it, increasing energy costs and reducing energy efficiency. The filter should be replaced monthly during heavy use during the cooling seasons. You may need to change the filter more often if the air conditioner is in constant use, if any family members have respiratory problems if you have pets with fur, and/or if it’s particularly dusty indoors.
Air-distribution registers are duct openings in ceilings, walls and floors where cold air enters the room. They should be closed after the cooling season ends in order to keep warm air from back-flowing out of the room during the warming season. Pests and dust will also be unable to enter the ducts during the winter if the registers are closed. These vents can typically be opened or closed with an adjacent lever or wheel. Remember to open the registers in the spring before the cooling season starts. Also, make sure they’re not blocked by drapes, carpeting or furniture.
In addition, homeowners should practice the following strategies in order to keep their central air-conditioning systems running properly:
Thermostats are devices designed to control the heating and cooling system in the home so that the air temperature remains comfortable. Homeowners should understand how thermostats operate, as well as the more common problems associated with them.
Thermostats can be manually controlled or set to activate automatically based on timers or room temperature readings. Most thermostats contain two meters: the “set” temperature that the thermostat is asking for, and the actual temperature. On a traditional dial-type thermostat, the user can increase the set temperature by rotating the dial clockwise, and lower it by rotating it counter-clockwise. Newer thermostats usually have digital displays, which can be used to adjust automated heating and cooling schedules.
In order to avoid false or “ghost” readings, which will cause unnecessary furnace or air-conditioner cycling, the thermostat must be installed so that it correctly reads the room temperature.
The following locations may cause the thermostat to give false readings:
Using a programmable thermostat in the winter, you can automatically turn down your heat at night or when you’re not at home. In the summer, you can save money by automatically turning your air conditioner up at night or when you’re at work.
Using a programmable thermostat, you can adjust the times that the heating and air conditioner go on and off according to a preset schedule. As a result, the equipment doesn’t operate as much when you’re asleep or when the house (or a part of it) is empty. Programmable thermostats can store and repeat multiple daily settings (six or more temperature settings a day) that you can manually override without affecting the rest of the daily or weekly program.
Optimal Home Inspections
2600 John F Kennedy Blvd
Jersey City, NJ 07306
North Jersey - Hudson County
(551) 261-1264
101 Dunhams Corner Rd
East Brunswick, NJ 08816
Central Jersey - Middlesex County
(551) 261-1264
NJ Home Inspector License Number: 24GI00176700
Certified Radon Measurement Technician: MET13906
Termite Inspector – Commercial Pesticide Applicator License Number: 61282B
Lead-Safe Certified Firm NAT-F238931-1

I inspect homes in Bergin, Essex, Hudson, Middlesex, Monmouth, Morris, Passaic, Somerset, and Union Counties. I inspect anywhere in New Jersey, but the counties listed here are where I work most.
| Monday | 8 AM – 9 PM |
|---|---|
| Tuesday | 8 AM – 9 PM |
| Wednesday | 8 AM – 9 PM |
| Thursday | 8 AM – 9 PM |
| Friday | 8 AM – 9 PM |
| Saturday | 8 AM – 9 PM |
| Sunday | 8 AM – 9 PM |
