• Skip to primary navigation
  • Skip to main content
  • Skip to footer
Optimal Home Inspections

Optimal Home Inspections

Most Recommended Home Inspector in NJ

  • Home
  • My Qualifications
  • Services
  • Pricing
  • Resources
  • Book an Inspection
    • Buyers Inspection
    • Homeowners Inspection

Marshal

Protect Your Home and Health: Get $25 OFF Radon Testing!

November 10, 2025 by Marshal

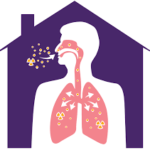
Radon is an invisible, odorless, tasteless gas that can silently build up in your home and is the second leading cause of lung cancer. Don’t wait—test your home today!

Special Offer Details!
For a limited time, get $25 off your professional radon test when you book it as a stand-alone service OR when you include it with your full home inspection package! Ensure your family breathes easy without breaking the bank.

Why Test for Radon NOW?

  • Invisible Danger: Radon is naturally occurring, and levels can vary block by block. The only way to know your risk is to test.
  • Health Assurance: Testing gives you peace of mind and the necessary information to mitigate high levels.
  • Easy & Professional: Our certified technicians use reliable, state-of-the-art equipment for accurate results.

Ready to Get Started?
Visit the Book an Inspection page to schedule your professional radon test and claim your $25 discount! Use the promo code radon25 when booking your stand-alone test or home inspection to redeem your $25 savings!

Filed Under: FYI, Radon, Safety

The Best Final Walk-Through Checklist

October 5, 2025 by Marshal

NOTE – The checklist below should not be relied upon or used as a substitute for a home inspection. The walk-through checklist is a helpful list of items to inspect after the present owners have moved out.

The final walk-through is a personal inspection to ensure that the property’s condition hasn’t changed since the home inspection and that the contract’s terms have been met.

This list serves as a reminder to assist you during the final walk-through inspection of the property. The final walk-through inspection should not be taken lightly, as some very serious damage has been discovered during these inspections. To give the reader an idea of some serious problems that have stopped the closing until the problems were addressed, they are as follows:

  • GARAGE – A fifty-gallon drum was found filled with some type of chemical. Needless to say, everything stopped until the drum was removed.
  • STAIRWAY BANISTER – An expensive banister to the second floor was severely damaged by the movers when they lost control of a heavy couch.
  • FINISHED BASEMENT – This was a vacant house. The electricity, water, and heat were turned off to save money. When the electricity was turned off, the sump pump became inoperative. A heavy rainstorm occurred. Without the functional sump pump, water penetrated the basement, causing severe damage to the finished area.
  • FRONT PORCH AND SIDEWALKS – A very large do-it-yourself mover’s truck backed up to the porch for easy loading. The truck hit the porch, damaging the steps and the porch itself, and cracked the sidewalk leading to the front of the house.
  • DEBRIS OR FURNITURE LEFT ON THE PROPERTY – When people move out and run out of time or money, they often leave debris or furniture behind. If you, as a buyer, accept the situation, it can ultimately cost more than you expect. If you encounter a debris problem when buying a house, we suggest the following steps:
    • Take photos of the furniture left in the house or the debris left on the property
    • Contact your attorney and report the situation, requesting some monetary negotiation at closing.
    • Try to have a contractor give a written estimate to remove the debris before the closing
    • Whatever the cost you are given to remove the debris or furniture from the property, double it. You may have to negotiate the fee at the closing.

How to prepare for the final walk-through

  • TIME OF WALK-THROUGH – As an investor, I have learned to always try to conduct a double walk-through. Typically, the walk-through is conducted on the day of the title closing. The problem with the closing-day walk-through is that if repairs are found, there is no time to obtain accurate repair costs. If possible, I always try to inspect the house as soon as the sellers have moved out and do another inspection on the day of closing. The primary advantage of a double walk-through is that if repairs are discovered during the first walk-through, there is sufficient time to obtain precise repair estimates.
  • HOME INSPECTION REPORT – Bring the home inspection report to the walk-through and check that any agreed-upon repairs were completed.
  • CHECKLIST – Print out this checklist to have a guideline for what to inspect. It’s very easy to forget to inspect something, and the item that goes uninspected is usually the most expensive to repair.
  • PHOTOS – Prepare to take photos of any damage or problems discovered.
  • FLASHLIGHT – Bring a reliable flashlight to help inspect any discovered damage. At this point, I would like to add that you should inspect the house during the daytime, not at night; you’ll discover repairs much faster in daylight. With vacant houses, it’s essential to inspect them during the day.
  • ELECTRICAL OUTLET TESTER – For a few dollars, purchase an electrical outlet tester so you can test all the outlets in the house and garage.

We found repairs, now what do we do?

  1. Call your attorney and inform him that repairs have been identified and must be addressed before the closing of the title. Last-minute serious repairs often result in significant costs being passed on to the buyer due to the urgency of closing and finalizing the purchase.
  2. The best course of action is to delay the closing until the repairs are completed and the terms are negotiated. If delaying the closing isn’t possible, ensure that sufficient funds are held in escrow to cover the repairs.

Easy To Follow Inspection Checklist

Grounds

  • Check the home inspection report. Have all agreed-upon repairs been completed?
  • Has there been any damage done by a large mover’s truck to the grounds or the front of the house?
  • Check trees and bushes around the house. You are ensuring that no tree roots damage the driveway and that tree branches do not contact the roof. Also, check trees and bushes planted too close to the house for similar problems.
  • Is there any debris left on the grounds?
  • What is the condition of the fence?
  • What is the condition of the driveway and sidewalk? Has there been any heavy truck damage?
  • Are the retaining walls in good condition?
  • What is the condition of the patio?

Exterior of The House

  • Check the home inspection report. Have all agreed-upon repairs been completed?
  • Doorbell – Test the doorbell.
  • Front steps – Is there any damage from movers?
  • Check the rear and side steps for damage.
  • Inspect:
    • Porch and decks
    • House siding, trim, and chimney
    • Roof, chimney, rain gutters
    • Basement windows – Look for damage to the exterior window and frame.

Roof – Chimney – Rain Gutters

  • Check the home inspection report. Have all agreed-upon repairs been completed?
  • Roof condition – Look for any damaged shingles, particularly if there has been a heavy rainstorm or extreme weather since the home inspection.
  • Flat roof – Look for cracks, patchwork, and standing water.
  • Visibly look for any cracks or brick damage.
  • Rain Gutters – Are the gutters clean and functional, and the downspouts in good condition and discharging the water at least 4 feet away from the house?

Garages and Car Ports

  • Check the home inspection report. Have all agreed-upon repairs been completed?
  • Free-standing garage – Inspect the exterior and roof.
  • Garage roof condition – Look for any damaged shingles, particularly if there has been a heavy rainstorm or extreme weather since the home inspection.
  • Vehicle garage door – Check the condition and function, and ensure you have the remote control for door operation.
  • Garage condition – The garage should be broom clean, with no debris, furniture, car parts, or other items left inside.
  • Garage – Check the walls, ceiling, floor, and garage entrance door to the house.
  • Electrical outlets: Check them with an outlet tester.
  • Electrical panel – The panel may be in the garage. Unless you’re an electrician, don’t poke around in the panel; check whether any breakers are tripped and whether they are labeled.

Kitchen

  • Check the home inspection report. Have all agreed-upon repairs been completed?
  • Check all appliances for function and condition.
  • Dishwasher –Start at the beginning of the inspection and see if it runs through a full cycle. Usually, dishwashers leak at the end of the cycle, not at the beginning.
  • Sink – Run water and check for leaks or damage to the sink or cabinet.
  • Check all cabinets, drawers, counter tops, and electrical outlets.
  • Inspect the walls, floor, and any tile work. Inspect the floor very carefully. It may have been damaged during the refrigerator’s move.
  • Stove – Ensure all burners light and the oven is functioning properly.
  • Inspect any doors and windows in the kitchen.

House Interior

  • Check the home inspection report. Have all agreed-upon repairs been completed?
  • Inspect all walls, floors, ceilings, and windows for damage.
  • Handrails and banisters are prone to damage from non-professional movers. Check for looseness and condition.
  • Inspect the floors very carefully. Often, floor damage is noted when the furniture is moved out.
  • Windows and doors are very susceptible to damage. Make sure every door closes properly, and there is no window damage. Check windows for cracks and ensure that all windows can latch securely. With thermos windows, look for moisture between the panes. If moisture is detected, the window must be replaced; it can’t be repaired.
  • Electrical outlets – Check all outlets for proper function using your outlet tester.
  • Lights and ceiling fans – Test all lights and run all fans, and ensure you have any necessary remote controls for ceiling fans.
  • Smoke detectors – Are all detectors located and in place as required by the municipality?
  • Pet damage – Check the house for any signs of pet damage or odors.

Fireplace

  • Check the home inspection report. Have all agreed-upon repairs been completed?
  • Masonry work – Check for cracks or damage to masonry.
  • Damper – Does the damper work? Most dampers are difficult to operate and require regular cleaning.
  • Gas fireplace – Does the gas and flame light come on, and does the circulation fan function?

Heat and Central Air Conditioning

  • Check the home inspection report. Have all agreed-upon repairs been completed?
  • Summertime inspection: Test the A/C by setting the thermostat to its lowest setting. If the outside temperature is below 80°, you may be able to test the heat by turning up the thermostat.
  • Winter-time inspection: If the outside temperature is below 65°, don’t test the A/C; you could cause damage.
  • Winter-time inspection of A/C – We recommend obtaining a homeowner’s warranty for the A/C from the seller in case it doesn’t function properly in hot weather. Several warranty companies offer such a warranty.

Bathrooms

  • Check the home inspection report. Have all agreed-upon repairs been completed?
  • Electrical outlets – Test with an outlet tester to ensure proper function.
  • Toilet – Is it tight to the floor, and does it flush properly?
  • Hot water – Is there adequate hot water?
  • Floor walls and tile work – Check for damage.
  • Bathtub – Check for damage to the tub, water flow, faucets, and showerhead. If there is a Jacuzzi tub, fill it to the jet section and start the jet flow. Check every jet for function.
  • Sink and cabinet – Check faucets for water flow, plumbing under the sink for leaks, and cabinets for damage.
  • Shower – Check the tile work for damage and the shower head for water flow. Also, look for signs of mold in the bathroom.
  • Ventilation fan – Is it functional? If window ventilation is used, does the window open and close?
  • Bathroom doors – Make sure they close and lock properly.

Attic

CAUTION – Do not go into an unfloored attic. One wrong move and you could fall into the room below and get seriously injured. In reality, it’s best to rely on the home inspector and their report to detail the necessary repairs and the attic’s condition. However, if the attic is floored and you want to inspect it, the following checklist will help:

  • Check the home inspection report. Have all agreed-upon repairs been completed?
  • Attic area used for storage – Check whether any storage has been left in the attic.
  • Insulation – Is it in good condition, or is it ripped, loose, and hanging in several areas?
  • Steps, handrails, and pull-down stairs – Check for safety and condition.
  • Insulation – Check for condition.
  • Bathroom fan ventilation discharge point – Ensure it discharges to the exterior, not into the attic. Note: A bathroom fan that discharges into the attic over time can create mold.
  • Attic wood structure – Make an inspection for damage to the wood structure, such as wood rot and water stains.

Basement

  • Check the home inspection report. Have all agreed-upon repairs been completed?
  • Basement moisture – Check for any moisture or water in the basement.
  • Basement storage – There should be no furniture or junk left in the basement. It costs money to haul furniture and junk to the dump.
  • Plumbing – Check the inspection report for any repairs that were supposed to be completed and look for any pipe leaks.
  • Basement moisture – Check for signs of water intrusion or stains.
  • Basement floor, walls, and ceiling – Check for cracks and water stains, and note any serious visible repairs.
  • Basement steps – Are the steps and handrail safe?
  • Electrical – Check the lights for loose or hanging wires.
  • Basement windows and doors – Check their condition. This is a red flag area for deferred maintenance and damage.

Crawl Space

  • Check the home inspection report. Have all agreed-upon repairs been completed?
  • Crawl space condition – Make a visible inspection for water intrusion, wood rot, and insulation damage.
  • Crawl space – It’s best to refer to the home inspection report for reported repairs and ask your attorney if the repairs were completed and certified by the seller. The crawl space area is a major concern for potential serious repairs, and it’s essential to follow up to ensure that the repairs were completed.

Structural

  • Check the home inspection report. Have all agreed-upon repairs been completed?
  • House exterior – Do the sides of the house appear straight and not bowed?
  • Porches and decks – Do they appear level with the house and not sag or be out of square with the house?
  • Roofline – Is it straight and level with the house, and not sagging?
  • Windows and doors – Are the window and door frames square?
  • Foundation – Look for cracks and damage.

Electrical

  • Check the home inspection report. Have all agreed-upon repairs been completed?
  • Lights and ceiling fans – Test as many as possible for functionality.
  • Electrical walk-through inspection – It’s best to refer to the home inspection report for reported repairs and ask your attorney if the repairs were completed and certified by the seller.

Plumbing

  • Check the home inspection report. Have all agreed-upon repairs been completed?
  • Pipes – Visibly inspect for any leaks or corroded pipes.
  • Water flow – Turn on the sink faucets on both the first and second floors to ensure adequate flow and pressure.
  • Water heater – Turn on the hot water faucet to check for adequate hot water. Also, check the copper pipes at the top of the heater for heavy corrosion.
  • Water heater on 2nd floor – Check for a catch pan and drain under the heater in case of a leak. A catch pan and drain can save you thousands of dollars when and if the heater leaks.

Laundry

  • Check the home inspection report. Have all agreed-upon repairs been completed?
  • Washer and dryer – Function test.
  • Washer discharge – Ensure the washer completes a full cycle and discharges without leaks.
  • Washer on 2nd floor – Check for a catch pan and drain. A catch pan and drain can save you from expensive repairs if the washer leaks.
  • Laundry sink – Check the faucets for water flow and inspect the area under the sink for any leaks.
  • Electrical outlet – Ensure it’s a three-prong, grounded outlet.
  • Dryer – Does it reach the proper heat setting, and does the front door latch securely?
  • Dryer vent: Is it functional, or crushed behind the dryer? Additionally, if the dryer vent pipe is made of plastic, it’s advisable to upgrade to a metal one for safety reasons.

Filed Under: FYI Tagged With: Resources

What Is a Pre-Listing Inspection and Should Home Sellers Get One?

August 29, 2025 by Marshal

Thinking of selling your home? A smart way to get ahead of the curve might just be a pre-listing inspection.

Before the first buyer ever walks through the door, more and more sellers are choosing to have their homes inspected upfront. Known as a pre-listing inspection, this optional step for sellers can reveal potential problems ahead of listing — and might just be the secret to a smoother sale.

A pre-listing inspection is a move that’s gaining traction in today’s unpredictable market. According to recent Redfin data, roughly 15% of home sale contracts were canceled in June 2025, often due to issues uncovered during the buyer’s home inspection after an accepted offer. In response, savvy sellers are taking a proactive approach to avoid surprises where possible and ease the journey to closing with a pre-listing inspection.

What is a pre-listing inspection?

A pre-listing inspection, or seller’s inspection, is exactly what it sounds like: a home inspection
ordered by the seller before the property goes on the market.

How it works: A licensed home inspector goes through the ins and outs of a home, just like in a typical home inspection, to identify any potential problems or repairs that might concern a buyer. Inspection specialist Yolaine Bonner, Vice President of Florida Insurance Inspection, recommends sellers conduct a pre-listing inspection anywhere from six months to a year ahead of listing their home. “This allows ample time to address any necessary repairs without feeling rushed,” Bonner advises. Sellers can then tackle problems on their own terms, list the house at a good price point, and even be more prepared for future negotiations.

What does a prelisting inspection cover?

A pre-listing inspection gives sellers a full report of the condition of their home, including
anything that might need to be repaired now, or to keep an eye on for the future.
While the exact inspection checklist for sellers can vary slightly depending on your location and the inspector, most follow a standard structure that includes checking:

  • Structural systems – Roof, foundation, attic, framing, and visible insulation.
  • Electrical – Panels, outlets, wiring, and overall system condition.
  • Plumbing – Fixtures, pipes, drainage, and the water heater.
  • HVAC systems – Heating, ventilation, and air conditioning units for age, performance,
    and safety.
  • Doors and windows – Operation, weather-stripping, and potential energy efficiency
    issues.
  • Moisture concerns – Evidence of leaks, water damage, or mold that could mean bigger
    problems.

Common deal-breakers for buyers, according to Bonners, include polybutylene plumbing, roofs older than 30 years (or 10-15 years for a flat roof), and even certain electrical panels. “Watch out for Federal Pacific, Zinsco, and Challenger, as these can make a property difficult to insure,” she warns.

Prelisting inspection vs buyer’s home inspection

At first, a pre-listing inspection might seem identical to a traditional home inspection, but the difference comes down to who’s ordering it, when it happens, and how the results are used. 

Timing:
A pre-listing inspection happens before the home goes on the market. A buyer’s home
inspection typically takes place after an offer is accepted.

Who pays:
The seller or possibly the listing agent covers the cost of a pre-listing inspection. The buyer pays for their home inspection if they choose to get one.

Disclosure:
In most states, sellers are required to disclose any issues uncovered in a pre-listing inspection
that affect the condition of the home, especially if they choose not to fix them.

Control and preparation:
A pre-listing inspection gives sellers the chance to address problems early and market the home strategically, while a buyer’s inspection often leads to time-crunched negotiations.

Whether the buyer or seller ordered, inspections are often a key part of the home-buying process. “The home negotiations that fall through are often due to expensive repairs or significant issues that prevent buyers from securing insurance, which is required for financing,” Bonner explains. 

How much does a pre-listing inspection cost?

Most pre-listing inspections fall in the $300 to $500 range, but the final cost depends on your
home’s size, location, and any extra tests you add on. You can expect to pay more for larger
homes over 2,000 square feet, if your home has additional features like outbuildings, or if you add inspections for special testing recommended by your agent, like radon, sewer scopes, or
termite checks.

While at first, sellers might be turned away by the cost, the small upfront fee is easily outweighed once the benefits of a seller’s inspection kick in.

Pros of getting a pre-listing inspection

Fewer surprises during the contingency period
A pre-listing inspection helps you get ahead of issues before your home goes on the market. Instead of being blindsided by a buyer’s inspection report, you’ll already have an idea of what to expect and can plan accordingly.

More control over repairs
When you know what needs fixing, you get to choose what to tackle, what to leave as-is, and
which upgrades are worth it. It also lets you shop around for the best contractor pricing without the pressure of a closing deadline.

Potential for faster closing
Buyers love transparency. When they feel confident in the home’s condition, they’re often
quicker to move forward. Fewer negotiations and less back-and-forth over repairs can help
everyone get to closing sooner.

Smarter pricing strategy
Armed with inspection details, you and your agent can set a listing price that reflects your
home’s true condition. It can also make negotiations smoother, since the value is backed by facts.

Cons of getting a pre-listing inspection

You have to disclose what you find
Any big problems found during a pre-listing inspection will legally need to be shared with
potential buyers. While being forthcoming can build trust, known repairs that are difficult or
expensive could also shrink the buyer pool.

It might be expensive
For sellers on a tight budget or trying to minimize prep costs, a pre-listing inspection might be
too much to pay upfront, especially if the inspection reveals repairs that require even more
money to fix.

You might fix more than necessary
Once you see the report from the home inspector, it’s tempting to fix everything, especially if
you’re aiming for top dollar. But not all repairs are deal-breakers, and some may have room for
negotiation later on if you can’t get to all the repairs.

What to do if issues are found during a pre-listing inspection

Minor issues are a normal part of owning an older home and are almost always expected, says
Bonner. 

“It’s important not to get too stressed about these smaller items,” she recommends, “Instead, sellers should prioritize making sure the property is insurable, as this can significantly broaden their pool of potential buyers beyond cash-only offers.”

Consult with your agent, but you have a few options. You can present a move-in-ready home by handling larger repairs ahead of time, price the home according to the work that needs to be done, or offer credits to help buyers fix the issues later. 

Should you get a pre-listing inspection?

A pre-listing inspection isn’t required and can be helpful for a lot of sellers, but other times it
might be unnecessary. 

If you’re planning to sell a newer home, listing “as-is” with no inspections, pricing aggressively
for a quick sale, or recently done work on the house, a pre-listing inspection likely won’t offer
much value.

But for most residential sellers, a pre-listing inspection is a smart move, says Joe Rath, Director of Industry Operations at Redfin.

“Get ahead of it and start knocking off that list of things that you can do,” Rath advises, “So that when a buyer brings a home inspector through, you have already anticipated a lot of what might
come up on that report.”

FAQs

What’s the difference between a home appraisal and a pre-listing inspection?
A pre-listing inspection evaluates the physical condition of the home, while an appraisal
determines the home’s market value. In other words, one helps identify potential repairs, and the other helps set a price.

What is the purpose of a pre-inspection?
A pre-listing inspection gives sellers a heads-up on any major problems with the home before putting it on the market. It can help position a property to be more competitive, especially in a buyer’s market. Ultimately, a pre-listing inspection gives more control to the seller when it comes to repair decisions and any future negotiations.

What are the benefits of a pre-listing inspection?
A pre-listing inspection can reduce the chance of the unexpected during the sale process,
increase buyer confidence, and help price your home strategically — all of which can lead to a
smoother, faster sale.

Reposted with permission of Redfin. Original post by Ashley Cotter

Filed Under: FYI, Services Tagged With: Prelisting inspection

Top 10 Mold Questions

August 1, 2025 by Marshal

Q1 This room smells musty. Can you tell if that’s mold or something else?

  • Musty odors often point to mold growth, but not always.
  • These odors originate from microbial volatile organic compounds (MVOCs), which are chemical compounds released by microorganisms such as mold, yeast, or bacteria.
  • While not exclusive to mold, a musty smell is a useful clue and usually warrants further investigation, especially in damp or poorly ventilated areas.

Q2 There was a previous water leak in the basement-should I be concerned about hidden mold?

  • Yes. Water leaks can absolutely lead to hidden mold growth, even if the surface looks fine now. Whether mold formed depends on how long the materials were wet, what kind of materials they were, and how thoroughly the area was dried and cleaned.
  • Past water events should always raise a red flag and may justify testing.

Q3 Can mold be present even if there are no visible signs?

  • Yes. Mold can grow behind walls, under flooring, or inside HVAC systems.
  • Growth may begin within 24 to 48 hours of moisture exposure.
  • Mold may thrive in dark, damp areas that are rarely inspected, which is why professional testing can be essential even in homes that look clean.

Q4: Should I test for mold even if the seller has already done remediation?

  • Yes, especially if an independent party didn’t do a post-remediation verification (PRV).
  • A third-party mold test ensures there are no remaining issues and avoids conflict of interest.
    Skipping this step could leave lingering mold behind build-back materials.

Q5 Can mold spores from outside affect the test results indoors?

  • Yes, they can— especially if windows or doors are open during sampling.
  • However, a well-executed mold test compares indoor samples with an outdoor baseline.
  • This comparison helps determine whether elevated spore levels are due to indoor mold growth or simply outdoor air infiltration.

Q6 How does air sampling compare to swab or surface testing?

  • Air sampling identifies airborne mold spores and provides a comprehensive view of indoor air quality. It’s useful when there are no visible signs, but odors or symptoms are present.
  • Surface testing (using swabs or tape lifts) confirms whether visible discoloration is actually mold and identifies the type.
  • Each has its use, and many inspectors use both for a more complete picture.

Q7 How long do mold spores stay in the air after a leak or flood?

  • Mold spores can remain airborne for hours to days, depending on factors such as airflow, ventilation, and activity in the area. However, once mold colonies grow and become established on surfaces, they can continue to release spores until they are fully removed.
  • That’s why timely remediation and follow-up testing are critical.

Q8 Will the report show what type of mold is present, or just the quantity?

  • Yes, the lab report shows both the types of mold spores identified and the quantity of each.
  • When an elevated amount is identified, you can easily determine its level with the at-a-glance page or refer to the lab data to see just how elevated it is.

Q9 Can mold in the HVAC system affect the whole house?

  • Absolutely. Mold in HVAC systems is one of the fastest ways for spores to spread throughout a home.
  • Once inside the ductwork, spores can circulate with every system run, leading to widespread contamination.
  • This is especially concerning because HVAC mold often goes undetected for long periods.

Q10 Will mold testing tell me if the issue is old or active?

  • Not directly. Most standard mold tests—such as air or surface sampling—identify the presence and quantity of mold spores, but they don’t distinguish between active (live) and inactive (dead) spores. Both types can be detected and still pose health concerns.
  • If there’s uncertainty, additional testing such as moisture readings, infrared imaging, or a professional mold assessment may help determine whether the conditions are still conducive to mold growth.

Q11 BONUS question– What do I need to do to clean up this mold problem?

  • According to industry standards like the ICRC S520 and R520 guidelines, here are the five key steps to properly address mold:
    • Identify the Mold
    • Determine the Extent of Growth
    • Contain the Area
    • Remove or Clean Moldy Materials
    • Verify the Cleanup Worked

Filed Under: FYI, Mold, Resources

Mold Testing is Essential

April 27, 2025 by Marshal

The Importance of Mold Testing in Your Home: Insights from a Home Inspector

Mold testing plays a crucial role in maintaining a safe and healthy home environment. As a home inspector, I recommend mold testing to uncover potential issues that may not be immediately visible. Here’s why mold testing is important.

Why Mold Testing is Important

Health Risks

Mold exposure can lead to various health problems, including respiratory issues, allergic reactions, and worsening of asthma. Identifying and addressing mold early can prevent these health risks and ensure a safer living environment.

Hidden Mold

Mold often grows in hidden areas, such as behind walls, under floors, or within HVAC systems. These hidden colonies can cause significant damage over time if left undetected. Mold testing helps uncover these hidden issues before they escalate into more serious problems.

Property Value

A home with undetected mold can lose value. Potential buyers may be deterred by mold issues, which can lead to reduced marketability and financial losses. Mold testing provides a clear understanding of any issues and helps maintain the value of your property.

Insurance and Liability

If you’re selling your home, undetected mold can lead to disputes or insurance claims from new owners. Mold testing provides documentation of the home’s condition, protecting you from future liability.

What is Mold Testing?

Mold testing involves collecting samples from the air and surfaces in your home to identify the presence and concentration of mold spores. Here is a brief overview of the process:

  1. Visual Inspection
    A thorough visual inspection is conducted to identify any signs of mold or conditions conducive to mold growth, such as water damage or high humidity.
  2. Air Sampling
    Air samples are taken from various areas of the home to measure the concentration of mold spores. This helps identify whether mold is present in areas that are not visible during the inspection.
  3. Surface Sampling
    Swabs or tape lifts collect samples from surfaces where mold growth is suspected.
  4. Laboratory Analysis
    The collected samples are sent to a laboratory for analysis to identify the types and concentrations of mold present.

The Lab I Use

When it comes to mold testing, accuracy and reliability are essential. That’s why I use Sporecyte for all my mold testing needs. Here’s what Sporecyte provides to homeowners:

  • Easy-to-Understand Reports Sporecyte provides detailed yet easy-to-understand reports. These reports include images of the mold in the samples and provide actionable recommendations for addressing any identified issues. This clarity helps homeowners understand the situation and take appropriate action.
  • Comprehensive Analysis Unlike traditional methods that rely on manual microscopy and analyze only a portion of the sample, Sporecyte utilizes whole slide scanners and artificial intelligence (AI) to analyze 100% of the samples. This comprehensive analysis ensures greater accuracy and more reliable results.
  • Assistive Screening Tool In addition to AI analysis, every sample at Sporecyte undergoes a review by a trained technician. This dual approach of AI and human expertise ensures a thorough and accurate analysis, providing the best possible results.
  • Quick Turnaround: Sporecyte’s advanced technology enables rapid and efficient analysis, providing results in a timely manner. This quick turnaround is essential for prompt decision-making and remediation, if necessary.

In Summary

Mold testing is an essential step in maintaining a healthy and safe home. By identifying hidden mold, protecting property value, and preventing health risks, mold testing gives homeowners peace of mind. Sporecyte’s advanced technology, comprehensive analysis, easy-to-understand reports, and quick turnaround make it the ideal choice for mold testing. As a home inspector, I trust Sporecyte to deliver accurate and reliable results, ensuring the best service for my clients.

If you have any questions or wish to schedule a mold inspection, feel free to contact me. Ensuring your home is mold-free is a priority for your health and peace of mind.

Filed Under: FYI, Mold

Livestream

March 19, 2025 by Marshal

Optimal Home Inspection is in the heart of Jersey City. We inspect Jersey City, Hoboken, Hudson County, and more! We inspect where you want to live. Check out our service area.

Filed Under: FYI, Jersey City

EPA’s Lead-Based Paint Dust Rule

March 5, 2025 by Marshal

The EPA has finalized a rule establishing stronger requirements for identifying and remediating lead-based paint hazards in homes and childcare facilities built before 1978. The EPA estimates that this rule will reduce lead exposure for nearly 1.2 million people yearly, of whom 178,000 to 326,000 are children under six.

The rule lowers the level of lead that can remain in the dust on floors, window sills, and window troughs after a lead paint abatement occurs to the following levels: 5 μg/ft2 on floors, 40 μg/ft2 on window sills, and 100 μg/ft2 on window troughs. These are the lowest levels that can be reliably and quickly measured in laboratories.

Optimal Home Inspections conducts lead-based paint inspections for homeowners and home buyers.

Read more about our lead inspection service here.

View the EPA’s summary here.

Filed Under: FYI

Fungal Glossary

December 9, 2023 by Marshal

A comprehensive list of the organisms that our lab can detect.

Predominantly Indoor Water-Related

The spores listed below the section “Predominantly Indoor Water Related” are spores which are not expected appear in the outdoor air commonly. Presence of these spore types indoors can be a strong indication of water damage, even at low levels.
Aspergillus/Penicillium Chains

Aspergillus/Penicillium spores appearing in attached chains can be indication of nearby fungal growth. Typically, airborne Aspergillus/Penicillium spores from the outdoors will separate and appear on air samples as individual spores.

ChaetomiumWater damage indicating mold that can be found on damp building materials such as drywall, paper, and wood. Some species can produce mycotoxins.
Clado-SphaerospermumA specific species of Cladosporium that can be reliably identified visually and which requires more moisture to grow. This allows it to be a suitable indoor water-damage-indicating mold.
FusariumA common plant pathogen that may also impact very wet building materials and humidifiers indoors. Other indoor sources may be molded fruits. Some species may produce mycotoxins.
GliomastixAn uncommon mold occasionally recovered from water-damaged building materials. Toxicity and human health effects not known.
ScopulariopsisA naturally occurring soil fungi that can also grow on water-damaged building materials. Scopulariopsis has a similarly high water activity as Stachybotrys.
StachybotrysA sticky, pigmented spore that can grow on cellulose containing building materials such as paper and wood. Due to the sticky nature of these spores, hidden, undisturbed growth may be difficult to detect with routine air sampling. Stachybotrys has been referred to as “toxic black mold” in the media; however the specific health effects from exposure to Stachybotrys has not been established and is still the subject of ongoing scientific research. Some species can produce mycotoxins.
UlocladiumWater damage indicating mold, can be found in outdoor air samples. Spores may be confused with Alternaria or Pithomyces. Major allergen.
WallemiaWallemia is a xerophile that can grow on relatively dry surfaces. Can be found growing on exposed wood and in house dust.

Indoor/Outdoor

The types of mold that appear under the section “Indoor/Outdoor” are types which can be found frequently in the outdoor air, but also can be found growing on building materials indoors. The presence of these types of mold indoors is not always an indication of water damage, concentrations should be compared closely to outdoor reference samples.
Alternaria-likeA common outdoor mold that may also be found growing on damp building materials. Can be an opportunistic human pathogen, and some species may produce mycotoxins.
Aspergillus/PenicilliumAspergillus/Penicillium an aggregate group of spores that are reported together due to the common morphology found amongst these spores. In non-cultured samples, a more specific identification can not be made without additional structures such as condiaphores. Aspergillus and Penicillium one of the most common outdoor molds, but can also be found growing on water damaged building materials indoors. Some species may also grow in properties with chronic humidity issues. Some species may produce mycotoxins. Some species may be potential human pathogens.
CladosporiumOne of the most common molds in the world, ubiquitous outdoors but also found in high concentrations in water damaged buildings.

Predominantly Outdoor

“Predominantly outdoor” molds are types that are found naturally in the outdoor environment, which do not readily grow on building materials indoors.
ArthriniumGenerally an outdoor mold, but on occasion can be found growing on damp cellulose building materials.
AscosporeThe Ascospore group represents a very large group of fungal spores that are produced by Ascomycota, otherwise known as Sac fungi. This group is generally represented by unimportant spore types that most likely originate from the outdoors. Spores from specific Ascomycota of note, such as Chaetomium, are reported separately and are not included in this report group.
BasidiosporeThe Basidiospore group represents the group of spores produced by Basidiomycota. Basidiomycota includes many macrofungi such as mushrooms, puffballs, brackets, and more. Basidiospores found indoors nearly always originate from the outdoor environment.
BipolarisOne of the most common fungal allergenic agents. Plant pathogen and soil based fungi.
BisporaMitosporic fungi that can rarely be recovered on damp wood materials.
BotrytisPlant pathogen found commonly on fruit.
Brachysporium-likeOutdoor fungi that is found in soil and decaying wood.
CercosporaMitosporic fungi which is a plant pathogen. Dispersed by wind, can be found in very high numbers in agricultural areas.
ChaetoconisPlant pathogen
CoelomyceteAsexual fungi that produce spores in fruiting bodies. Many are plant pathogens. Infrequently impact IAQ due to spores not being readily dissipated by air movement.
CurvulariaOutdoor fungi that can rarely be recovered from water damaged fabrics.
EpicoccumCommonly found in outdoor air, uncommon growth on building materials indoors. Juvenile spores may be confused with Stemphylium, Alternaria, Pithomyces, or Ulocladium
ExosporiumPlant pathogen
FusicladiumAgricultural pathogen affecting many different crops.
LasiosphaeriaFound on dead, decorticated deciduous trees throughout the world including Canada, Costa Rica (as L. chrysentera Carroll & Munk), Denmark, England, France, Germany, New Zealand, Philippines, Russia, Switzerland, and USA.
MitosporeA group of undifferentiated asexual fungal spores. These spores can be determined in being asexual spores, but can not be differentiated further.
Myrothecium
An outdoor fungi that inhabits plant surfaces and soil, as well as the fruiting bodies of some mushrooms. This mold is extremely rare on building materials.
NigrosporaCommon in the outdoor air, especially in warmer climates. Grows on plant material and soil and has an active spore dissemination.
OidiumAlso known as “powdery mildew”, this fungi only grows on plants and does not affect building materials.
PaecilomycesThis mold is mainly found outdoors growing on decaying plant material. Can be found indoors growing on spoiled food and rarely on building materials. Individual spores may be misidentified as Aspergillus/Penicillium. Some species can rarely cause infections in humans.
PeronosporaAlso known as “downy mildew”, this fungi only grows on plants and does not affect building materials.
PestalotiopsisAn ascospore that is found growing on plants. Some species have the unique ability to grow on synthetic polyurethane polymers.
PithomycesGenerally common outdoor mold that grows on plant debris and soil, this can very rarely be found growing on paper indoors.
PolythrinciumA distinctly shaped spore, human impact has not been studied. This fungi does not affect building materials.
PyriculariaPlant pathogen that affects many different grain crops.
Smut, Perconia, and Myxomycete-likeThis class is generally made up of various plant pathogens/parasites with a common morphology (round/brown). Smuts and Perconia do not grown indoors, Myxomycetes can rarely be found growing on building materials.
SpegazziniaSpores with a very distinct lobed morphology, does not grow on building materials indoors.
StemphyliumThis fungi grows on plants, and can be misclassified as Ulocladium. Very rarely can be found growing indoors.
TorulaOutdoor fungi that grows on various types of plant material, including decaying plants and crops.
TrichocladiumRare outdoor fungi, many species are marine molds growing on submerged wood. Other species can be found growing on plants and soil.
Unidentified SporeObjects which can be identified as fungal spores, but can not be differentiated further.
UrediniosporesThin walled spores produced by Rust fungi during the uredium life stage.
ZygomycetesA large group of fungi including Mucor and Rhizopus. These fungi are rapid growing, and can be found growing in soil, dung, and on plants. Some species can cause infections in humans. Indoors, these fungi do not typically impact building materials, but can be present in spoiled food.
ZygophialaPlant pathogen that causes blot disease on a number of hosts.

Background Particulates

Hyphal FragmentsHyphae is the filamentous growth structure for mold. A low level of hyphal fragments indoors in not concerning, however if hyphae is present in large numbers it may indicate indoor growth nearby.
PollenGeneral class for pollen grains from plants.
Skin Fragments – HumanSkin cells that appear to be human in source.
Skin Fragments – AnimalSkin cells that appear to be non-human in source. Low levels of these skin cells can be present outdoors and in homes with no history of pets.
CarbonAirborne carbon can come from a number of sources such as combustion (stoves, candles, cars, etc) or road dust
SoilConglomerate debris collected in the sample that appears to be soil related.
Particulate: <2.5 micronsNumber of objects collected on the sample between ~1um and 2.5um.
Particulate: 2.5 – 10 micronsNumber of objects collected on the sample between 2.5um and 10um.

Particulate: >10 microns
Number of objects collected on the sample larger than 10um.

Filed Under: FYI, Mold

Air Conditioning Refrigerant Phase Out

April 17, 2023 by Marshal

What a home buyer should know about older Air Conditioning systems.

Freon, also known as R-22, is a refrigerant in air conditioners and refrigerators. It is a greenhouse gas contributing to climate change, so the Environmental Protection Agency (EPA) has phased it out. As of January 1, 2020, it is illegal to manufacture or import new R-22.

What does this mean for homeowners?

  • You can continue to use your existing air conditioner or refrigerator that uses R-22. However, if it breaks down, you must have it repaired or replaced with a new unit that uses a different type of refrigerant.
  • The cost of R-22 is expected to increase as it becomes more scarce. This means that repairs and replacements may be more expensive.
  • Several new refrigerants are available that are environmentally friendly. These refrigerants are typically more expensive than R-22, but they may be more efficient and last longer.

If you are considering replacing your air conditioner or refrigerator, it is a good idea to talk to a qualified HVAC contractor about the different options available to you. They can help you choose the best unit for your needs and budget.

Here are some additional things to keep in mind about the Freon phaseout:

  • The EPA has many resources to help homeowners learn about the phaseout and options.
  • Several incentives are available to help homeowners offset the cost of replacing their air conditioners or refrigerators.
  • The phaseout of R-22 is part of a larger effort to reduce greenhouse gas emissions and combat climate change.

Filed Under: FYI, HVAC

Tips on Saving Money and Energy in Your Home

February 3, 2023 by Marshal

Now updated in 2022! The Energy Saver guide offers tips for saving money and energy at home and on the road.

By following just a few of the simple tips in the Energy Saver guide, you can make your home more comfortable and easier to heat and cool–while you save money. We bring you the latest information on energy-saving, efficient technologies. We even give tips for using clean, renewable energy to power your home.

This guide shows you how easy it is to cut your energy use at home and also on the road. Some of the tips are simple to do. Others require more effort and investment but promise big savings over the years. 

Download the guide today for an overview of the tips and improvements that will contribute to your energy bottom line and make our planet healthier and cleaner. Then visit the Energy Saver website for more details on how to improve the efficiency of your home.

Made available as a service to our clients from the U.S. Department of Energy

Download the Energy Saver Guide

Download the Energy Saver Guide in English, updated in 2022:

Energy Saver Guide: Tips on Saving Money and Energy at Home

Filed Under: FYI

  • Page 1
  • Page 2
  • Page 3
  • Interim pages omitted …
  • Page 10
  • Go to Next Page »

Footer

Optimal Home Inspections LLC

Call 551-261-1264

Optimal Home Inspections
2600 John F Kennedy Blvd
Jersey City, NJ 07306
North Jersey - Hudson County
(551) 261-1264

101 Dunhams Corner Rd
East Brunswick, NJ 08816
Central Jersey - Middlesex County
(551) 261-1264

Follow us

  • facebook
  • instagram
  • linkedin
  • threads
  • x

Licenses

NJ Home Inspector License Number: 24GI00176700

Certified Radon Measurement Technician: MET13906

Termite Inspector – Commercial Pesticide Applicator License Number: 61282B

Lead-Safe Certified Firm NAT-F238931-1

Associations

American Society of Home Inspectors (ASHI)
Garden State Chapter American Society of Home Inspectors
International Association of Certified Home Inspectors (InterNACHI)
NJ International Association of Certified Home Inspectors

Our Service Area

I inspect homes in Bergin, Essex, Hudson, Middlesex, Monmouth, Morris, Passaic, Somerset, and Union Counties. I inspect anywhere in New Jersey, but the counties listed here are where I work most.

Opening Hours

Monday 8 AM – 9 PM
Tuesday 8 AM – 9 PM
Wednesday 8 AM – 9 PM
Thursday 8 AM – 9 PM
Friday 8 AM – 9 PM
Saturday 8 AM – 9 PM
Sunday 8 AM – 9 PM

Copyright © 2026 · Optimal Home Inspections LLC · Log in

  • Home
  • Book an Inspection
  • Services
  • Pricing
  • Standards
  • Resources
  • Reports